Check out the video here!
In this article:
After what seems like years, we finally got ourselves some coilovers for the Bronco, specifically the Eibach Pro-Truck Stage 2 Coilover kit. But, since we are slapping the coilovers on, we might as well finish the whole suspension with the RPG Offroad goodies we got a little while back. So without further adieu, lets get started!
But first, what exactly are we adding to the build?
Eibach PRO-TRUCK LIFT STAGE 2 | Coilover Lift System
These are Eibach’s latest and greatest contribution to the Aftermarket Suspension world, bringing promising gains to the entire Bronco platform, regardless if you’re two or four door, Sasquatch or Non-Sasquatch package.
First thing of course is the obvious height gain you’ll get. At the very bottom setting of these, you’re looking at roughly an 1.5” increase on Non-Sasquatch and .5” on Sasquatch, BUT at its max, Non-Sas. trucks can expect to see about 4” whole inches of lift all around! (Sas. Trucks gain around 3” all around.)
With that height increase, you can now fit those larger wheels and tires you’ve been dying to get on the truck, as well gaining a bunch more ground clearance for those taking their Bronco far into rough terrain.
With Eibach’s Championship proven progressive spring design, as well as variable force valving within the shocks themselves, these coilovers are designed for great ride on the road but, when the conditions demand in an offroad situation, they provide!
And the best part? All the components are made by Eibach in the USA.

Check out the coilover kit here!
Eibach Pro-Truck Coilover Stage 2 (Front & Rear) (2021-2022 Ford Bronco (4-Door) - E86-35-056-01-22
Of course, we're adding the Full RPG Offroad Suspension
Including the Rear Upper and Lower Links, as well as Front Upper Control Arms and Tie Rods Kits.
Check out the full RPG Offroad Suspension Write-up Here !

Now, onto the install!
*Before you attempt to install this in your driveway, we recommend reading our entire instructions below. This is an extensive job that requires a press. While it can be done in the driveway, Professional Installation is recommended!*
First, we’re going to tackle the rear, starting first with the RPG Offroad Components.
Before we start on the vehicle, we want to assemble the links as much as we can, assuring we have all of the necessary components.
We started by taking our RPG lower links, installing 1 C-Clip and pressing in the spherical bearings. (Of course, make sure these press flat and completely to avoid damaging the link itself).
Once these are pressed in, you can finish by installing a c-clip on the other side and giving it a slight tap with a punch to ensure the clip is fully seated.

The upper link also require a spherical bearing to be pressed in, but also requires a spherical tie rod end to be threaded in. These are a two piece assembly, allowing for easy adjustment while installed on the truck. (We recommend applying some anti-seize or grease to the threads of both pieces)

Starting by first safely lifting and securing the vehicle, followed by removing the wheels.
Next, you want to identify the lower and upper rear link. Once identified, you can start the disassembly. Start by supporting the rear end itself, preferably with a jack, as you will need to lift and lower the rear as needed to suit the new links.
If you choose to do so, this is where you start to remove the fuel tank. Once supported (large surface area jack, such as a transmission jack with straps) use an 18mm socket to loosen, but NOT YET remove the 8 bolts that secure the fuel tank/skid plate assembly to the bottom of the truck.
Disconnect the harness from the top of the tank itself, along with the quick-disconnect vent tubes and feed line. (Make sure all tubes/harnesses disconnected as you slowly lower the tank)

Once tank is removed (or lowered enough) you should be able to access and remove that pesky bolt that Ford has blocked in. Remove the Torx Head bolt that holds the small cover using a T25 Torx bit. Then loosen the bolt using a 24mm Socket. You can leave the bolt to support the bar until you have the last bolt on the link removed as well.
Now, you can move on to the last bolt on the lower link. First remove small cover using a T25 Torx bit, then using a 24mm Socket, remove the last bolt, along with the first bolt and the entire OEM Link.
Install the now-assembled RPG Lower Link with your spacers setup as shown below:
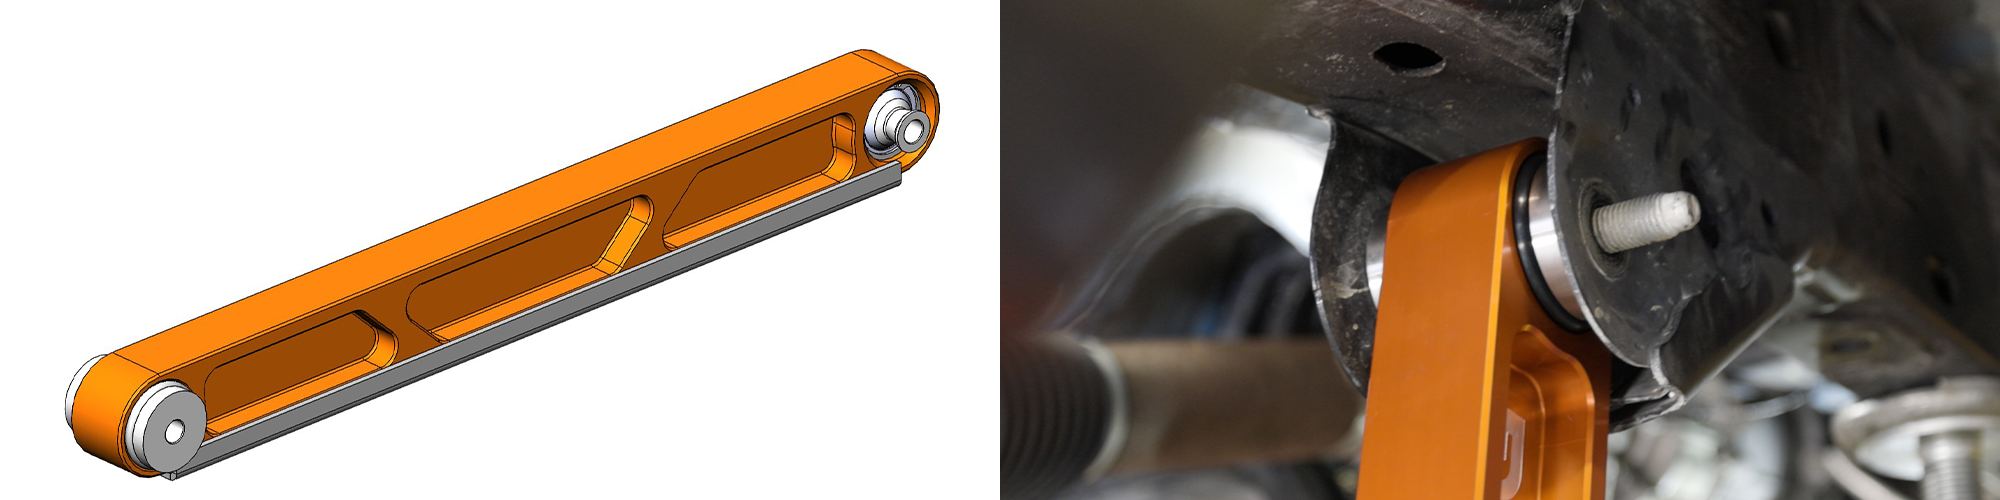
Once installed with the OE Hardware, tighten each to OE torque specification. (159 ft. lbs)
(You may have to trim down the locking tab on the lower OE bolt, as it may make contact with the RPG link once tightened).
Now, you can move on to the upper link. Just like the lower link, start by loosening each bolt using a 24mm socket, but not fully removing the upper bolt until the lower bolt is loosened and removed.
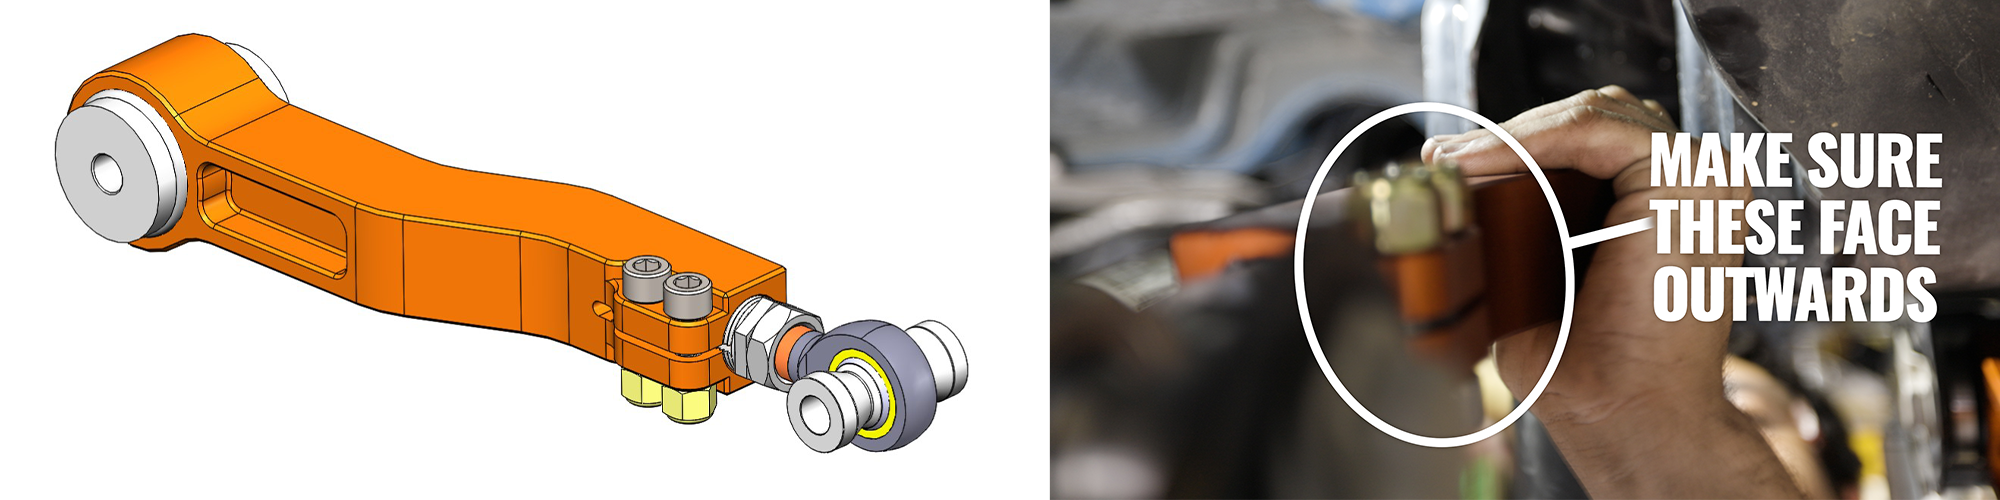
Once out of the vehicle, you can compare the length of the RPG link to the OE Link. You should then adjust the RPG link to closely resemble the OE link’s length. Once adjusted, install on the vehicle using the OE Hardware.
Remember, the two clamping bolt on the RPG upper link should face outward on either side. Also, take note of the spacers used:
Re-Install the OE Hardware and torque down to OE torque specification. (159 Ft.lbs)
Re-Install the small covers with the T25 Torx Head Bolts. (Torque to 97 In. Lbs / ~8 Ft.lbs)
Now, re-install the fuel tank/skid plate assembly. We recommend using a small amount of thread-locker on each bolt of the assembly. Torque each to OE Spec. (59 lb.ft)
Repeat these steps for the opposite side.
Once we completed the rear links, we moved on the Eibach coilovers. These were super simple and took less than 20 minutes to install.
If not supported already, support the rear end. Then, loosen the lower strut mount using a 27mm Socket.
(You can fully remove this bolt, although, it may require the rear end to be moved up or down to relieve weight)
Now, to start with the top, we have to remove the fender liner by removing all the push-pins. Once removed, it should give us access to the strut mounting nuts. Take a 15mm wrench/socket to loosen and remove these 3 nuts. Be careful, as once removed, the strut should fall out of the truck.
Now, time to install the Eibach Coilover. Start at the top mount, installing the 3 bolts Eibach provides. Once started, you can line up the bottom mount. Do not forget to use the supplied spacers to ensure proper mounting on the rear end. Once the bolt is installed, go ahead and tighten everything up snug.
Re-install the fender liner.
Once you have everything on the rear installed, make sure everything has been tightened and torqued down. Then you can go ahead and move up to the front!
Just like we did with the rear, we’re going to go ahead and start with assembling the RPG components. The RPG upper control arm requires on spherical bearing to be pressed in and 2 spherical tie rod end links to be threaded on, similar to the rear upper links. (Again, it is advised to use anti-seize or grease on the threads)
The RPG tie rods require 2 spherical tie rod end links to be threaded on either side with a locking nut. This makes for a simple, yet strong construction that is easy to adjust. Once you get the OE tie rod off later in the install, you will compare it to the RPG tie rod assembly for adjustment to give yourself a solid place on the alignment.
Once that is all together like pictured below, you’re ready to start on the truck.

First we’re going to start disassembling the OE tie rod. Once removed from the OE spindle, you can loosen the locking nut and start to spin off the outer tie rod. You will want to count how far the outer tie rod is so you can properly reassemble it to compare it to the RPG tie rod.

Once you have the outer tie rod off, you can take the clamp off the OE boot, remove the boot, then take a large crescent wrench to the inner tie rod, which should allow it to break loose where you can fully remove the entire tie rod assembly.
Once removed, you can reassemble it to the same spec that it was when installed on the truck and compare it to your RPG tie rod. Make the adjustments necessary on the RPG tie rod to get it roughly the same length as the OE tie rod and begin installing the RPG tie rod starting with the inner spherical link mount.
Once tightened (OE torque specification is 89ft. lbs), you can finish installing the RPG tie rod but do not install the outer tie rod onto the spindle just yet, since we have to disassemble the spindle in order to get the strut out as well as the upper control arm.
Next, we can move onto the disassembly of the spindle, starting with the brake caliper and ABS Sensor. It’s crucial to get these two off and out of the way of the spindle and upper control arm to ensure A hose or wire gets pulled during the process.
Next, you can remove the sway bar link from both spindles, since one will not move without the other. You can also dismount the sway bar assembly from the body of the truck, but we found this way to be much easier and work fine.

While you’re down there, you can take an 18mm socket and loosen the lower strut mount nuts.
Next you can take an 18mm wrench and loosen the nut holding the upper control arm into the spindle. Once the nut is loose, you can give the spindle a slight tap, in which the upper control arm ball joint should pop right out of the spindle.

To give ourselves even more mobility with the lower control arm and to avoid joint damage, do you want to remove the axle nut with a 36mm socket and slide the end of the axle out of the spindle. This will allow plenty of motion for us to get the OE Strut out and the Eibach Coilover in.
Next, you can go ahead and loosen the 3, 15mm nuts at the top of the strut. Once removed, you should be able to pry down on the lower control arm and the OE Strut Should come right out
Now that that’s out-of-the-way, this leaves a perfect opportunity to install the RPG upper control arm. Start by taking a 21mm socket/wrench and 24mm socket/wrench and remove the OE pivot bolt holding in the OE upper control arm. You may need to remove fold up some of the fender liner to give you better access. Once the bolt is out, the OE control arm should come right out.
Compare your OE Upper control arm with the RPG upper control arm and make adjustments as needed to the RPG upper control arm. Once adjusted, install the RPG upper control arm with the OE pivot bolt and torque to OE torque specification. (122 ft. Lbs)
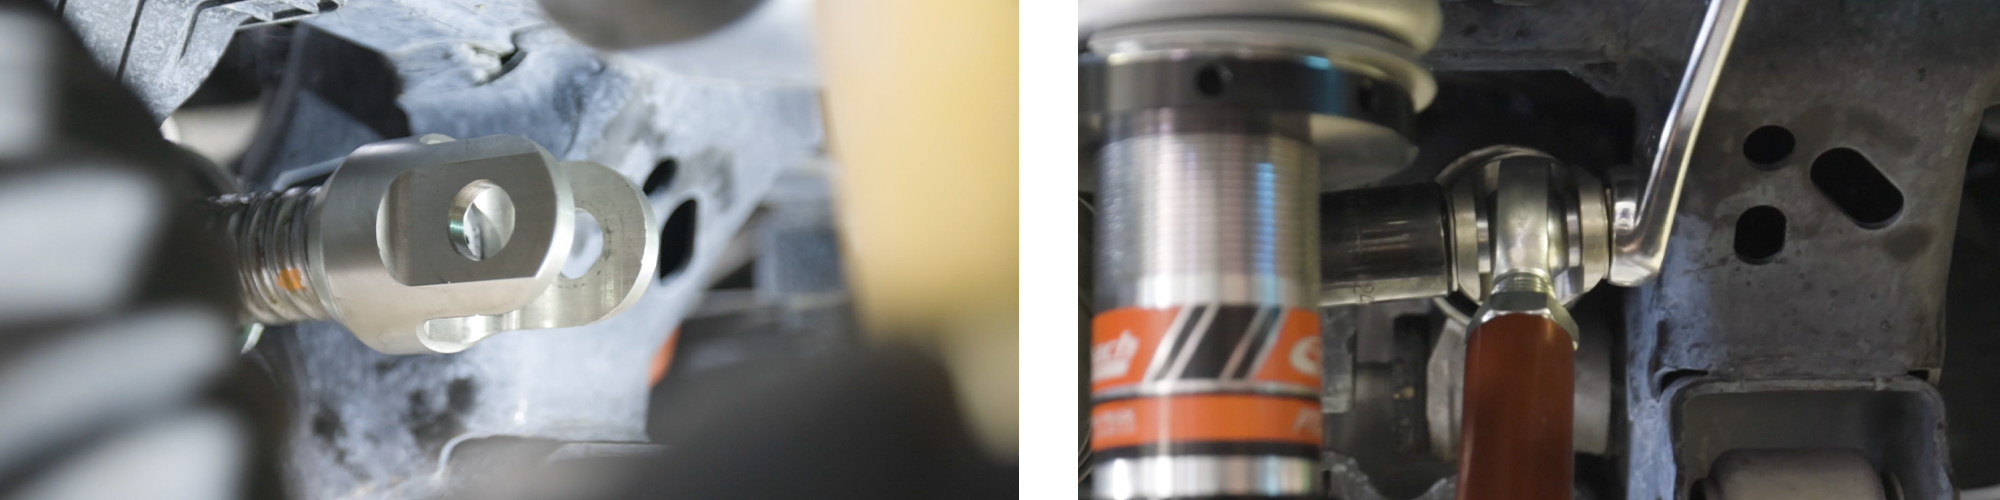
Now that we have the control arm installed, we went ahead and installed the Eibach Coilover. First, we loosely started the top three bolts, then installed the two bottom bolts into the lower control arm. Once the lower bolts were in place, we tightened both upper and lower hardware.
Now, you can go ahead and start reassembling your spindle, starting with the RPG control arm to the top of the spindle. Torque the bolt to OE specification (46 ft. Lbs). Once you have everything installed, you can finally finish up the tie rods by first installing the new boot using the provided clamps and then installing the outer link onto the spindle. Torque to OE specification. (76ft. Lbs).

Repeat steps on the opposite side.
Once we had everything tightened up, we went ahead and started adjusting the coilovers.
Of course, with given manufacturer tolerances, each coilover may need to be at different heights in order to level the actual truck out itself.
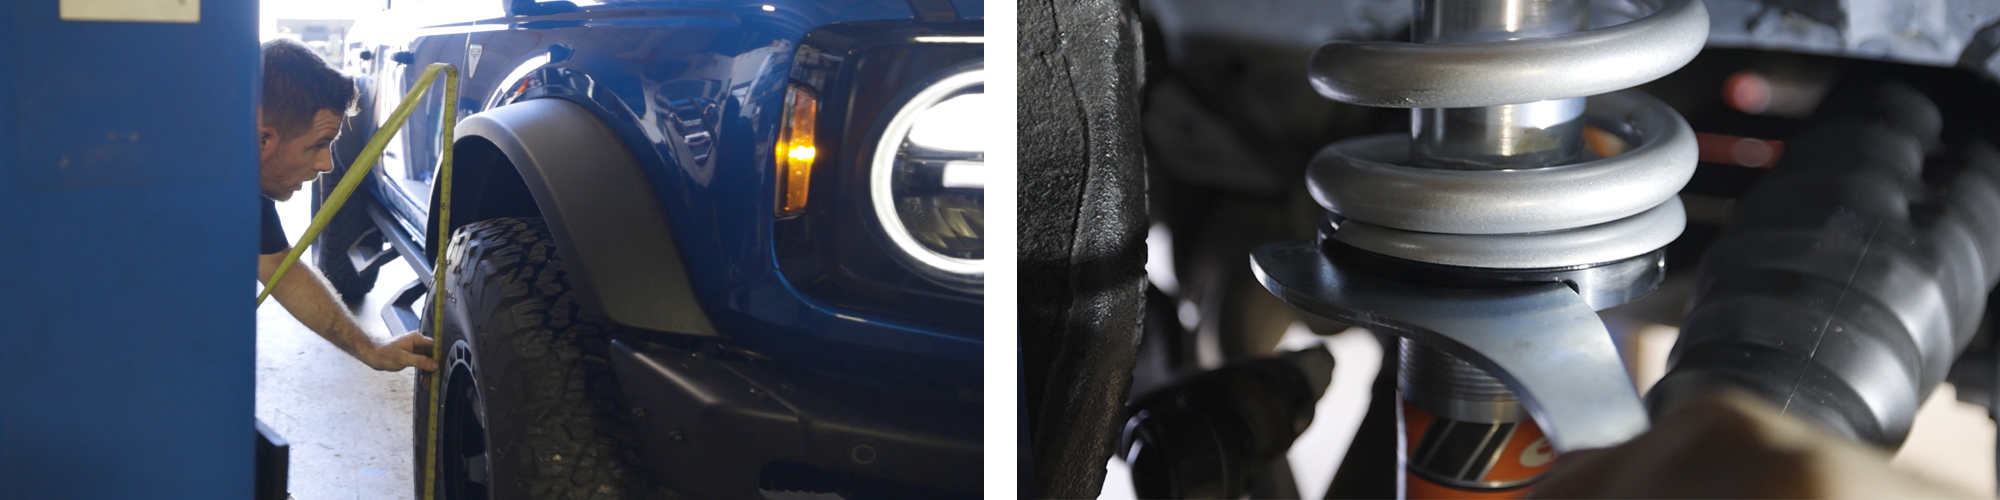
Once we had the wheels and tires mounted back on, we drove the truck a couple feet to let the suspension settle for the most part. Then we measured the height of each corner of the truck from the ground to the start of the fender flare. This gave us a rough estimate to where each coilover needed to be adjusted. We went ahead and leveled the truck out completely.
When adjusting your coilovers, it is much easier and less destructive to lift the truck off the ground just to take the weight off of the spring perch. While it is possible to adjust it with the truck on the ground, there is always more of a chance to damage the threads or where the spanner wrench fits.
Now, it’s onto the alignment shop to make sure this thing goes down the road straight as an arrow!
Overview
After an alignment and some "break in procedure" offroading, this setup is proper! While it is a tad stiffer on the road, given, the offroad experience benefits a ton from it! A much more stable ride through both mud and sand.
Overall, not only does this suspension look amazing, it works as intended. No longer do you have to fear breaking the weak stock components when you're out there tearing up the dirt! Whether your crawling rocks or hooning around in the mud, these components are sure to make your truck an animal!
Looking for more upgrades? Check our selections here:
Feel free to reach out to us if you need any help with your 2021+ Ford Bronco, whether it's engine, exhaust, suspension, or aesthetic related, we can get you on the right path in no time...


About the Author
Joe, also known as “the Average Joe” is anything but your “average” automotive enthusiast, with an early influence of speed, his life revolves around anything with a motor, from race cars, street cars, motorcycles, boats and more.